Introduction
Dynamic range is generally defined in color science as the amount visual information between the darkest and brightest parts of an image. The more dynamic range you have, the more detail we'll see between the shadows and highlights. Most modern digital and film cameras capture more dynamic range than what TV's/projectors/screens can be displayed. Cinematographers and colorists utilize a camera's wider dynamic range to create the look of a project. This can mean softer highlights, more details in the shadows, or (more commonly) correction if a shot is too dark/bright.
In theory, proper exposure at the camera's native ISO equally distributes its dynamic range from shadows to highlights. In practice, the distribution of the dynamic range is unique to each camera. Some have more details in the highlights, others in the shadows. Film, particularly Kodak Vision 3, has an incredible amount of detail in the highlights, but not as much detail in the shadows. On the other hand, digital has more detail in the shadows while, at times, struggling to keep the details in the highlights. What if a cinematographer/colorist could control how that dynamic range is distributed? Can we use it to develop a look?
At the simplest level, both film and digital cameras record information, a limited amount of information. That information is distributed throughout the camera's dynamic range. The camera doesn't know when an image is over/underexposed, it just records the information and distributes it. If we purposefully over/underexpose an image and then correct it, are we redistributing the dynamic range and not the camera? How can we test this idea?
The Experiment
Finding the details
We'll start with the applying the first theory as our control group: a camera properly exposed at native ISO will distribute its dynamic range equally. In practice, our camera, the GH4, has 12 stops of dynamic range when using vLog-L. According to Panasonic, vLog-L has 4 stops of dynamic range in the highlights and 8 stops of dynamic range in the shadows. Here is a properly exposed image at the camera's native ISO (hover your mouse over the image for color grade info):

This particular location has a lot of dynamic range with pure sunlight creating an edge on the subject and pockets of dark shadowy areas hidden from the sun.
Now that we know how the image should look according to its manufacturer, let's start over/under exposing the image in increments of one stop. First, over exposure:


And now underexposure:


Almost instantly, we can notice more details in areas that the proper exposure couldn't show. Let's look at specific areas for overexposure:

How do these areas look as we overexpose?

At one stop over, we see a marginal increase in detail in the shadows.

At two stops over, we see a lot more detail in the dark areas

At three stops over, we start to lose detail in some shadow areas, but see more in the darkest areas.

At four stops over, almost the entire image has lost a considerable amount of detail except for the darkest area, which was the black BBQ grill cover near the color chart.
Naturally, as we overexpose we can see more details in the shadows. Let's look at underexposure:

How do these areas look as we underexpose?

Almost immediately, we have more details in the hat and shoulders. The umbrella and c-stand arm still go pretty white, but there is a touch more information in there.

All three areas of interest have substantially more information

At three stops underexposed, we're starting to loose detail to the shadows of the shoulders and hat, naturally because they're black. The umbrella actually looks "properly exposed" while the c-stand arm is still pretty white.

Overall, things are pretty dark at -4 stops, so much so that we may not be able to recover anything outside of the brightest parts of the image.
Recovering the Image
We've confirmed that over/underexposing an image can show more details in the highlights/shadows repsectively. However, the image is obviously wrong because it's either too dark or too bright (mis-exposure). Our goal is to control the dynamic range by correcting the mis-exposure. Because we have a control image (the properly exposed image), we know where the grey card and color chart should be. Correcting the mis-exposed images by getting middle grey back to its proper exposure should correct the image. Here are my rough results:


Analysis: Overexposure
Let's examine the overexposure results first by looking at the key areas from earlier:

At one stop over, we see a the shadows look correct with no change. However, the highlights on the shoulders and skin look a little more contrasty than the control image. Naturally, noise is almost non-existent when compared to the control image; naturally this happens when you overexposure and correct, so any overexposure from here will have cleaner and cleaner noise. Overall, the image is still acceptable when corrected.

At two stops over, we're beginning to lose detail in the highlights. The shoulders are going white quickly and the contrast is increasing. Additionally, we're seeing more contrast in the skin, particularly how white skin reacts to highlights. Finally, look at the umbrella and underlight on the c-stand arm compared to +1 and the control image; they're starting to lose detail. The shadows overall, on the other hand, have no change and look correct.

At three stops over, the shadows still look correct! However, we're starting to lose detail everywhere else. The shoulders go white incredibly fast and the skin looks way off on contrast. Again, look at the umbrella and underside of the c-stand arm: they have almost no detail at all! [Note: the sun is moving, but we can still see a shadow on the umbrella]

At four stops over, almost the entire image has a strong contrast. It looks like a poorly screen printed t-shirt with solarization and saturation freaking out. The shadow areas, tough, still look correct. Overall, this image is unusable.
As we overexpose, we're putting the middle area detail into the highlights. When we correct the overexposure, we're attempting to bring the middle detail back to the middle. However, at some point we've overexposed the image too much that there is little to no detail left to bring back down. The shadows, however, looked nearly identical every time we corrected it because they never were overexposed all the way to the highlights.
Analysis: Underexposure
Let's examine the overexposure results first by looking at the key areas from earlier:

At one stop under, the image still looks correct. We're noticing a slight change in highlight detail retention albiet from my ham-fisted color grading process. We barely see an increase in noise, even at the pixel peeping level. The shadows are slightly losing detail, but overall this image is still acceptable when corrected.

At two stops under, we're noticing a lot changing in the shadows. It's becoming difficult to see the details in the shirt and the dark plant is becoming a dark blob. Additionally, noise has increased substantially. Highlight detail is remaining the same.

At three stops under, noise has exploded. Shadow detail on the shirt and hat are getting flat. The dark patio and dark plant are blending together. The subject, with white skin, is holding with the underexposure while any other subject with darker skin will likely lose detail. The highlights again are staying the same.

At four stops under, noise dominates the image. Shadow details are sparse with anything dark blending together into a flat tone. The shirt has no detail and the dark patio is almost a dark rectangle. Again, the highlights look normal.
As we underexpose we lose shadow detail. Similar to when we overexposed, the more middle details we put into the shadows, the less we have to recover. Additionally, as we correct the image, noise increases exponentially. The highlights are identical every time we correct the image.
Analysis: Overall
Over/Underexposure moves the middle details of the image into the highlights or shadows of the image. The more dramatic the movement, the less middle detail we can recover. We noticed in the overexposure that the shadow details stayed the same for every correction while the highlights lost detail; with the underexposure the highlight details stayed the same while the shadows lost detail. What we haven't done (yet) is play with the highlights/shadows respectively.
Remember when we looked at those key areas before we corrected the image? We've corrected the image to look like the control image, but we know there are more details than we are seeing. With underexposure, we know there are tons of highlight details that we've pushed up to white when we attempted to make the image look like the control image. This means the dynamic range of the camera has been redistributed.
For instance, the shadows show less and less detail as we underexpose and correct, but the highlights never changed because they are getting more and more information. (We saw this before we corrected the image.) Essentially, if we've underexposed the camera by about 3 stops, then that means we've moved about 3 stops of dynamic range into the highlights.
The most noticable artifacting is noise. Naturally, the more we underexposed and corrected, the stronger the noise became.
Further Clean Up and Fine Tuning
Noise levels are subjective, every filmmaker has their own personal limits to what is an acceptable amount. Let's take a look at a noisy image we corrected:
Some people may think it looks good, others think too digital. Digital noise is often chromatic. We could make the noise colorless:

Removing the noise desaturated the image a little, but that's easily corrected. This is still the same level of noise, albiet more reminescent of high ISO film by Eddi Laumanns:

If that grain is still too much, then popular noise reduction software can bridge the gap:

The noise in this image was corrected with the Nik Collection: Dfine 2 in a very rough manner. Programs like Neat Video, Magic Bullet Denoiser III, Adobe After Effects, DaVinci Resolve, so on and so on all have a more fine toothed approach that can have jaw dropping results.
The above image, though, feels a little plastic and soft. That's a common side effect of denoising. Ironically, grain/noise contributes to how sharp an image appears. We can go a step further by adding in film grain and increasing sharpness (hover for details):

Using the Details
Now that we've moved the dynamic range, let's use it! We'll take the -2 stops underexpose image and show more details from the midtones and higher. Here's our control image:
Now our correction that matches the control image:

Now our correction showing more details in the highlights:

The final image has softer highlights that feel less contrasty than the control. We can do that because we have more details in the highlights due to redistributing the dynamic range. (To see the differences between the -2 that matches the control and the -2 that plays with the highlights: look at the edge light on the t-shirt, the edge light on the skin, the white board with writing, and the sunlight on the umbrella)
Use in Practice
So far, the above images are just tests. How does this theory work in practice? Will the noise from underexposure be too much?
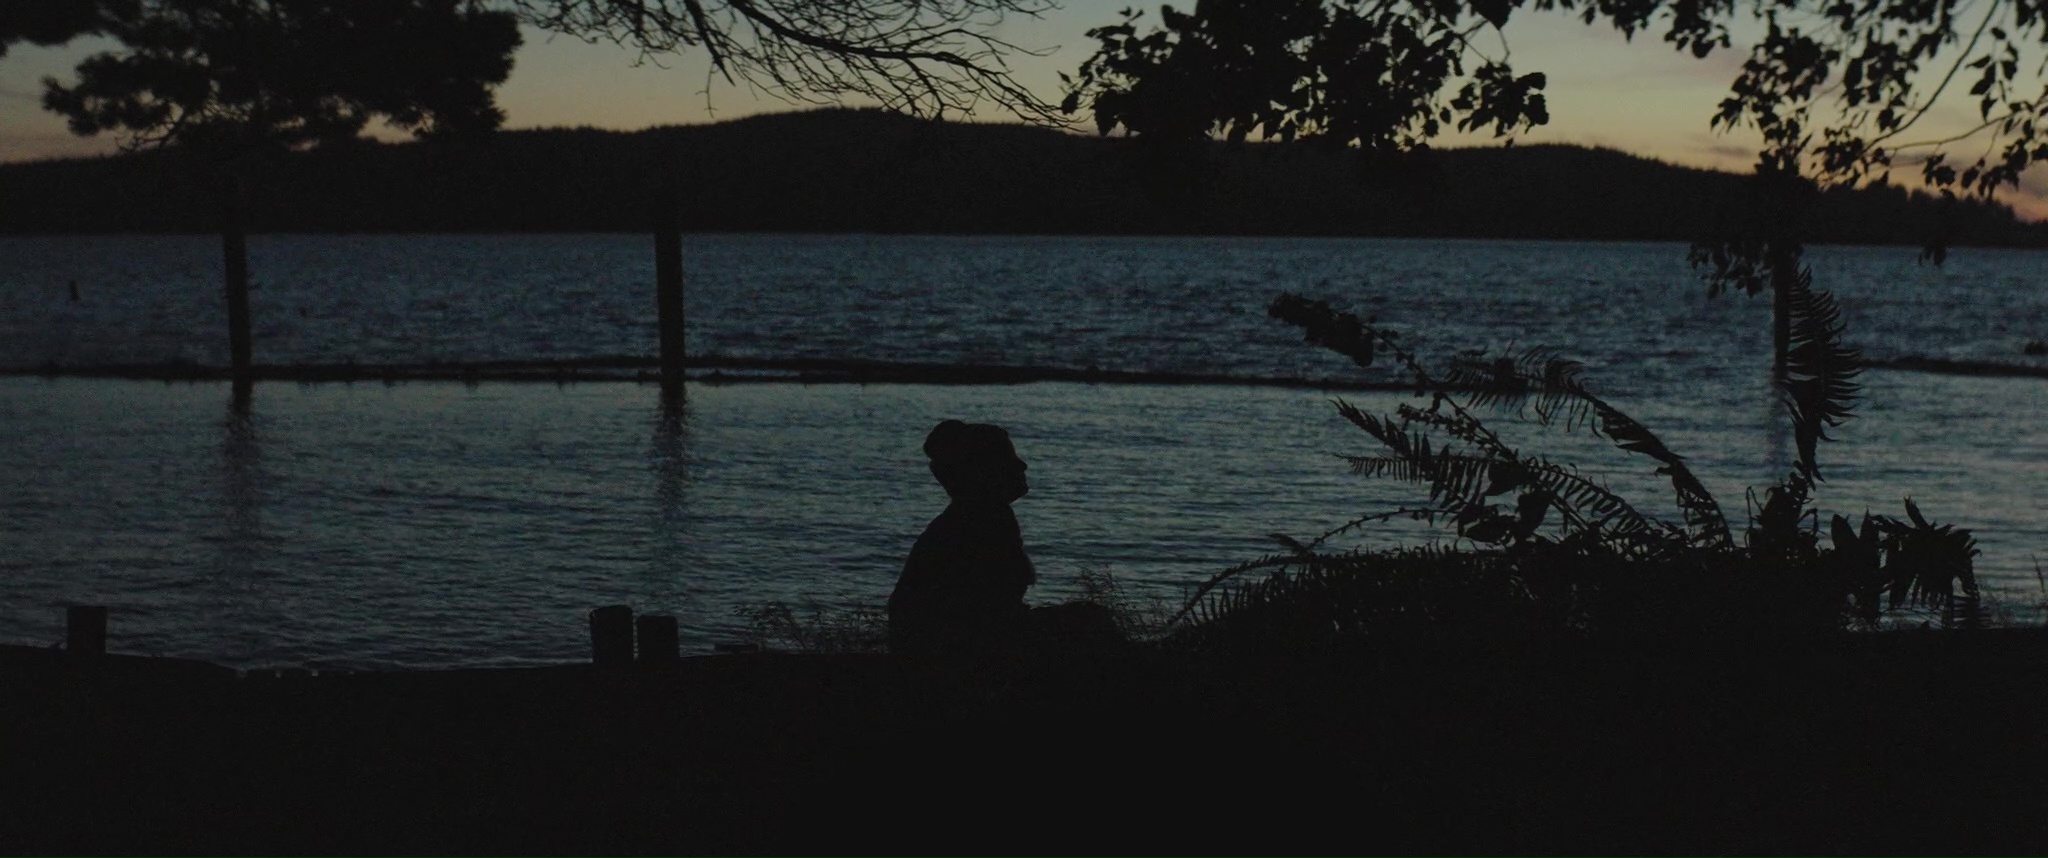
The above is from the film The Watchman's Canoe, shot on the Alexa Mini, ARRI RAW, 3 stops underexposed and corrected in post-production.
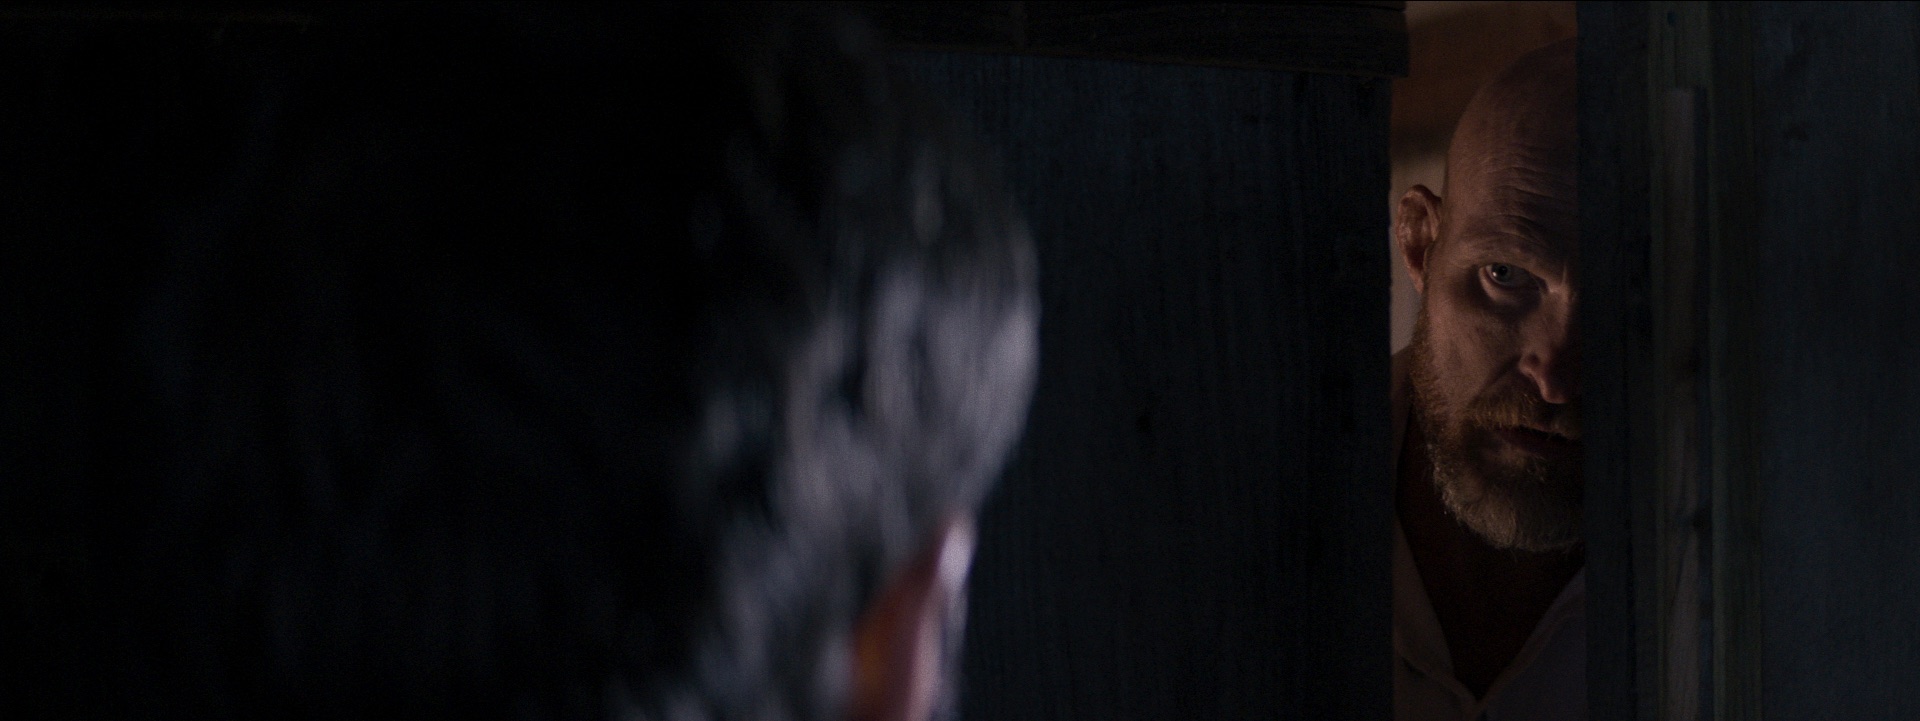
The above is from the film Ashburn, shot on the Alexa Mini, ProRes 4444 XQ, 2 stops underexposed and corrected in post-production.
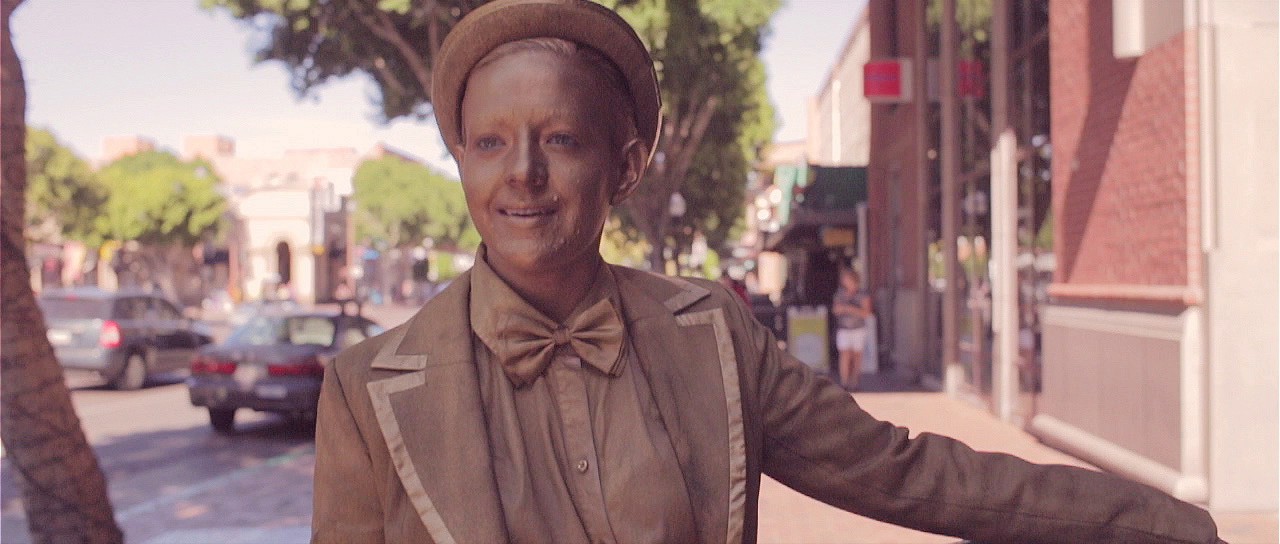
The above is from the music video Talk, shot on the Canon 5D Mark III, h.264 4:2:0, 2 stops underexposed and corrected in post-production.
more examples below added by AJ Young on 10/29/2020
When the benefits of shifting exposure are useable depends on the dynamic range of the scene overall. David Mullen, ASC has two great examples:
Example #1 - David Mullen, ASC from Cinematography.com
The thing to keep in mind about dynamic range is that while you record 14-stops no matter what ISO you have, your shot content might not contain 14-stops of range. You may be underexposing a subject for example with no hot highlights so you are losing shadow detail without necessarily gaining more highlight detail.
The thing to keep in mind about dynamic range is that while you record 14-stops no matter what ISO you have, your shot content might not contain 14-stops of range. You may be underexposing a subject for example with no hot highlights so you are losing shadow detail without necessarily gaining more highlight detail.
Example #2 - David Mullen, ASC from Cinematography.com
You can imagine a scenario, for example, of a caucasian actor in a medium grey T-shirt against a green wall of shrubs with the sun dead overhead where the hottest highlight is perhaps the shine on his cheek. So if you underexpose so that your 14-stop range becomes 11-stops of highlights and 3-stops of shadow information but your highlights never get beyond 8-stops above middle grey, then you've lost a few stops of dynamic range.
You can imagine a scenario, for example, of a caucasian actor in a medium grey T-shirt against a green wall of shrubs with the sun dead overhead where the hottest highlight is perhaps the shine on his cheek. So if you underexpose so that your 14-stop range becomes 11-stops of highlights and 3-stops of shadow information but your highlights never get beyond 8-stops above middle grey, then you've lost a few stops of dynamic range.
Digital: LOG vs RAW
added by AJ Young on 10/29/2020
RAW data isn't an image that we can see, it's just data. Debayering creates an image out of the data. For most cinema applications, that image is a LOG image. It's designed to have a logarithmic response to light, like film. This means the dyamic range isn't distributed linearly but exponentially (or more accurately logarithmically), more details are packed into toe/head of the characteristic curve (Archival PDF Version).
This method corrects the mis-exposure with the LOG image, getting a more filmic response as opposed to changing how the RAW data is processed into a LOG image. David Mullen, ASC puts this perfectly:
David Mullen, ASC from Cinematography.com
Since film negative has a logarithmic response to light, heavy underexposure puts more shadow and midtone detail in the flatter (and grainier) toe of the characteristic curve. With digital, the log version is applied to the raw linear sensor readout so rating the camera faster doesn't make it lower in contrast if recording raw, in theory. However, in [this] case, by recording Log-C ProRes and underexposing, you were emulating more of a film response by pulling up information from the bottom of the log curve.
Since film negative has a logarithmic response to light, heavy underexposure puts more shadow and midtone detail in the flatter (and grainier) toe of the characteristic curve. With digital, the log version is applied to the raw linear sensor readout so rating the camera faster doesn't make it lower in contrast if recording raw, in theory. However, in [this] case, by recording Log-C ProRes and underexposing, you were emulating more of a film response by pulling up information from the bottom of the log curve.
Conclusions
Over/Underexposing an image redistributes the camera's dynamic range when we correct the mis-exposure. The more we overexpose, the cleaner the image. The more we underexpose, the noiser the image. Using those shifted details relies on the artist's intent, but the details are there. This method isn't limited to developing a strong look for a movie (like in the examples above), it can be used on a case by case basis for when a cinematographer needs more details in a specific part of the image. For example, if a window is too overexposed or a corner of a room that is too dark. Choosing on set to redistribute the dynamic range is a powerful tool that shouldn't be underestimated.
If anything I've discussed or shown is incorrect, please reach out to me at AJYoung.DP@gmail.com
Here are .tif (16 bit RGB) and .dpx (10 bit RGB) files of each exposure to test this theory out yourself:
- Control-Image-LogC.tif
- Control-Image-LogC.dpx
- Over-Image-LogC-001.tif
- Over-Image-LogC-001.dpx
- Over-Image-LogC-002.tif
- Over-Image-LogC-002.dpx
- Over-Image-LogC-003.tif
- Over-Image-LogC-003.dpx
- Over-Image-LogC-004.tif
- Over-Image-LogC-004.dpx
- Under-Image-LogC-001.tif
- Under-Image-LogC-001.dpx
- Under-Image-LogC-002.tif
- Under-Image-LogC-002.dpx
- Under-Image-LogC-003.tif
- Under-Image-LogC-003.dpx
- Under-Image-LogC-004.tif
- Under-Image-LogC-004.dpx